
How to create a Webhook bot
A Webhook bot opens and manages positions from JSON signals you send it: from your own trading system, an Altrady alert, or a third-party service. Setting one up takes a few minutes: create the bot, then copy its webhook URL and message into whatever sends your signals.
If your signals come from a TradingView Pine Script strategy, the TradingView Bot is built for that: see How to create a TradingView bot.
Before you start: you need a connected exchange account or a demo account.
Create the bot
- Open Bots in the left-side menu and click + Create at the top right of the Trading Bots page.
- In the Create a bot dialog, pick Webhook bot.
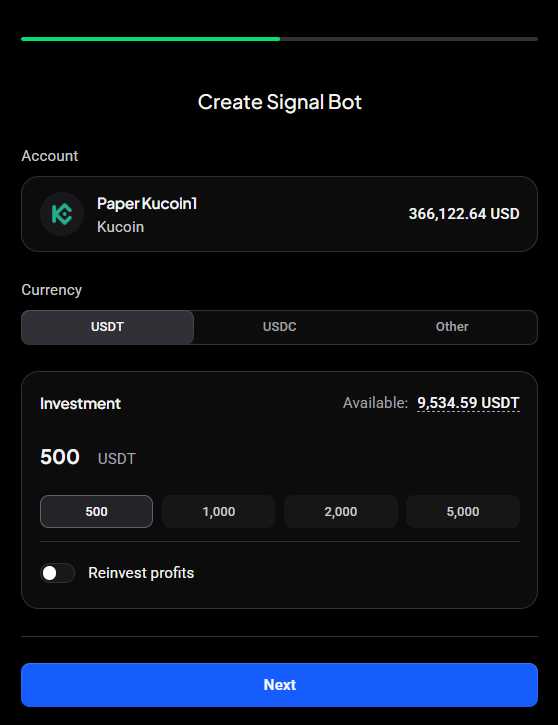
- Choose the Account (Live or Demo), the Currency the bot trades against (USDT, USDC or Other) and the Investment: the total the bot may use across all its positions. Turn on Reinvest profits to add profit from closed positions back into the investment.
- Click Next.
 🔍 Click the image to see a larger version
Pick a template
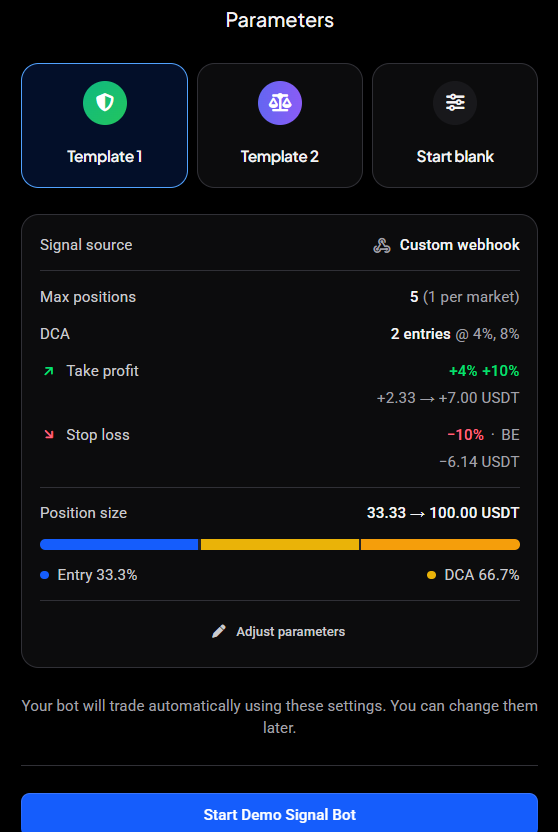
The Parameters step offers Template 1, Template 2 and Start blank. The summary card shows what the bot will do: Signal source reads Custom webhook, followed by max positions, DCA entries, take profit, stop loss and position size.
 🔍 Click the image to see a larger version
Click Adjust parameters to change any setting first. The tabs work the same as on a signal bot: see The Parameters tabs. Where a setting is switched to Signal instead of Custom, your webhook message decides it.
When it looks right, click the start button at the bottom, Start Demo Signal Bot on a demo account.
Save your secret
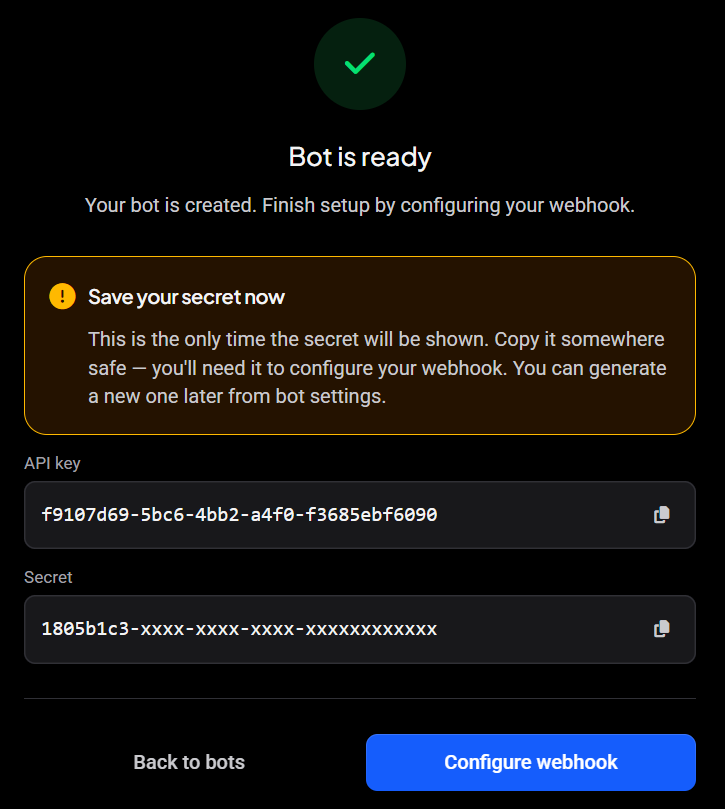
The Bot is ready screen shows the bot’s API key and Secret. Copy the secret somewhere safe now: every webhook message needs it. If you lose it, you can generate a new one from the bot’s settings.
 🔍 Click the image to see a larger version
Click Configure webhook to build your first message, or Back to bots to do it later.
Build the webhook message
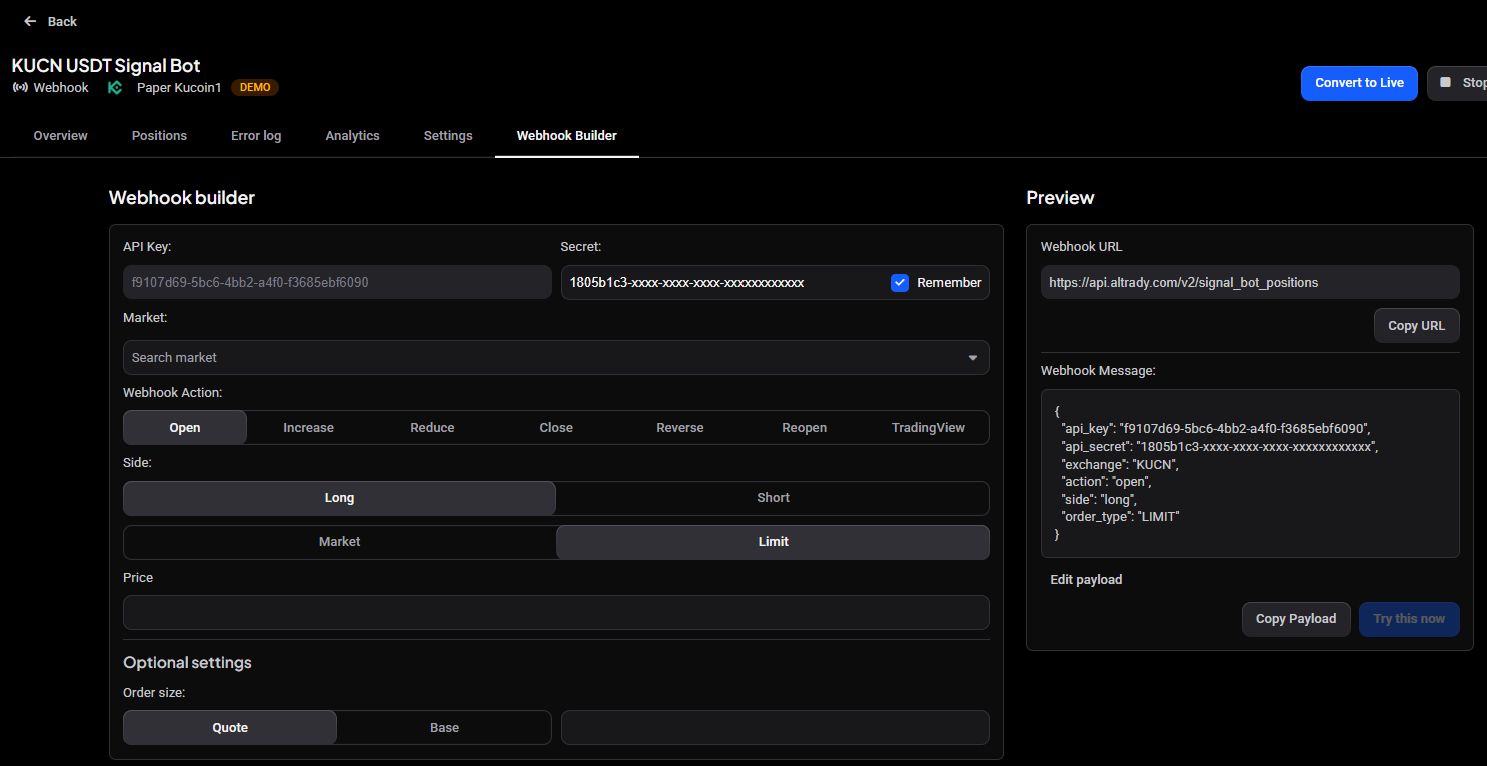
Configure webhook opens the bot’s Webhook Builder tab. You can come back to it any time: open the bot and pick Webhook Builder, next to Overview, Positions, Error log, Analytics and Settings.
 🔍 Click the image to see a larger version
On the left, set up the signal:
- API Key and Secret: the bot’s credentials. Tick Remember to keep the secret filled in for the rest of your session, so you don’t have to paste it again. If Secret is empty, paste the secret you saved.
- Market: the market the signal trades.
- Webhook Action: Open, Increase, Reduce, Close, Reverse, Reopen or TradingView.
- Side: Long or Short, then Market or Limit. A limit order also needs a Price.
- Optional settings: the Order size, in Quote or Base currency.
On the right, the Preview builds the result as you go:
- Webhook URL: where your signals go. Copy URL copies it.
- Webhook Message: the JSON your sender posts to that URL. Copy Payload copies it, and Edit payload lets you change it by hand.
For every action and field the message can carry, see the Webhook Signal Reference and valid exchange and symbol values.
Send your signals
Point whatever sends your signals at the Webhook URL and have it post the Webhook Message. That can be your own code, a third-party signal service, or an Altrady alert. For how the pieces fit together, see How webhook signals work in Altrady.
The bot stays idle until a valid signal arrives, so a quiet bot right after setup is normal.
Find your credentials later
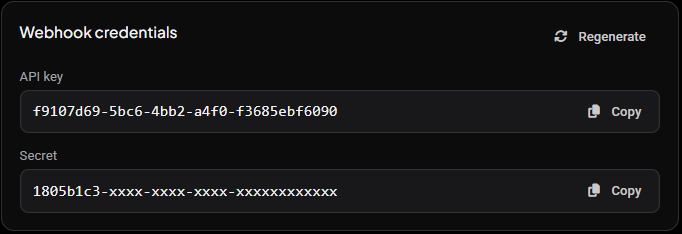
The bot’s Settings tab has a Webhook credentials card with the API key and Secret, each with a Copy button. Regenerate creates new credentials. After regenerating, update the key and secret wherever your signals are sent from, or the bot stops receiving them.
 🔍 Click the image to see a larger version
Your plan sets how many bots you can run at once, and every kind of bot shares that allowance: see How many bots can I run?.
Still stuck?
If signals are sent but no position opens, work through Troubleshooting: TradingView Webhook Signals Not Triggering Orders in Altrady and check the bot’s Error log: it records why a signal was rejected.