
Connect Poloniex
Connect Poloniex
Connecting your Poloniex account lets Altrady see your balances and place trades on your behalf. It only takes a few minutes, and at no point does Altrady need permission to withdraw your funds.
Poloniex doesn’t offer Fast Connect (one-click sign-in) yet, so you’ll connect it using an API key: a special password pair that only allows trading, not withdrawals. If you’re not sure what an API key is, our API Keys Explained article covers the basics.
Step 1: Log in to Poloniex
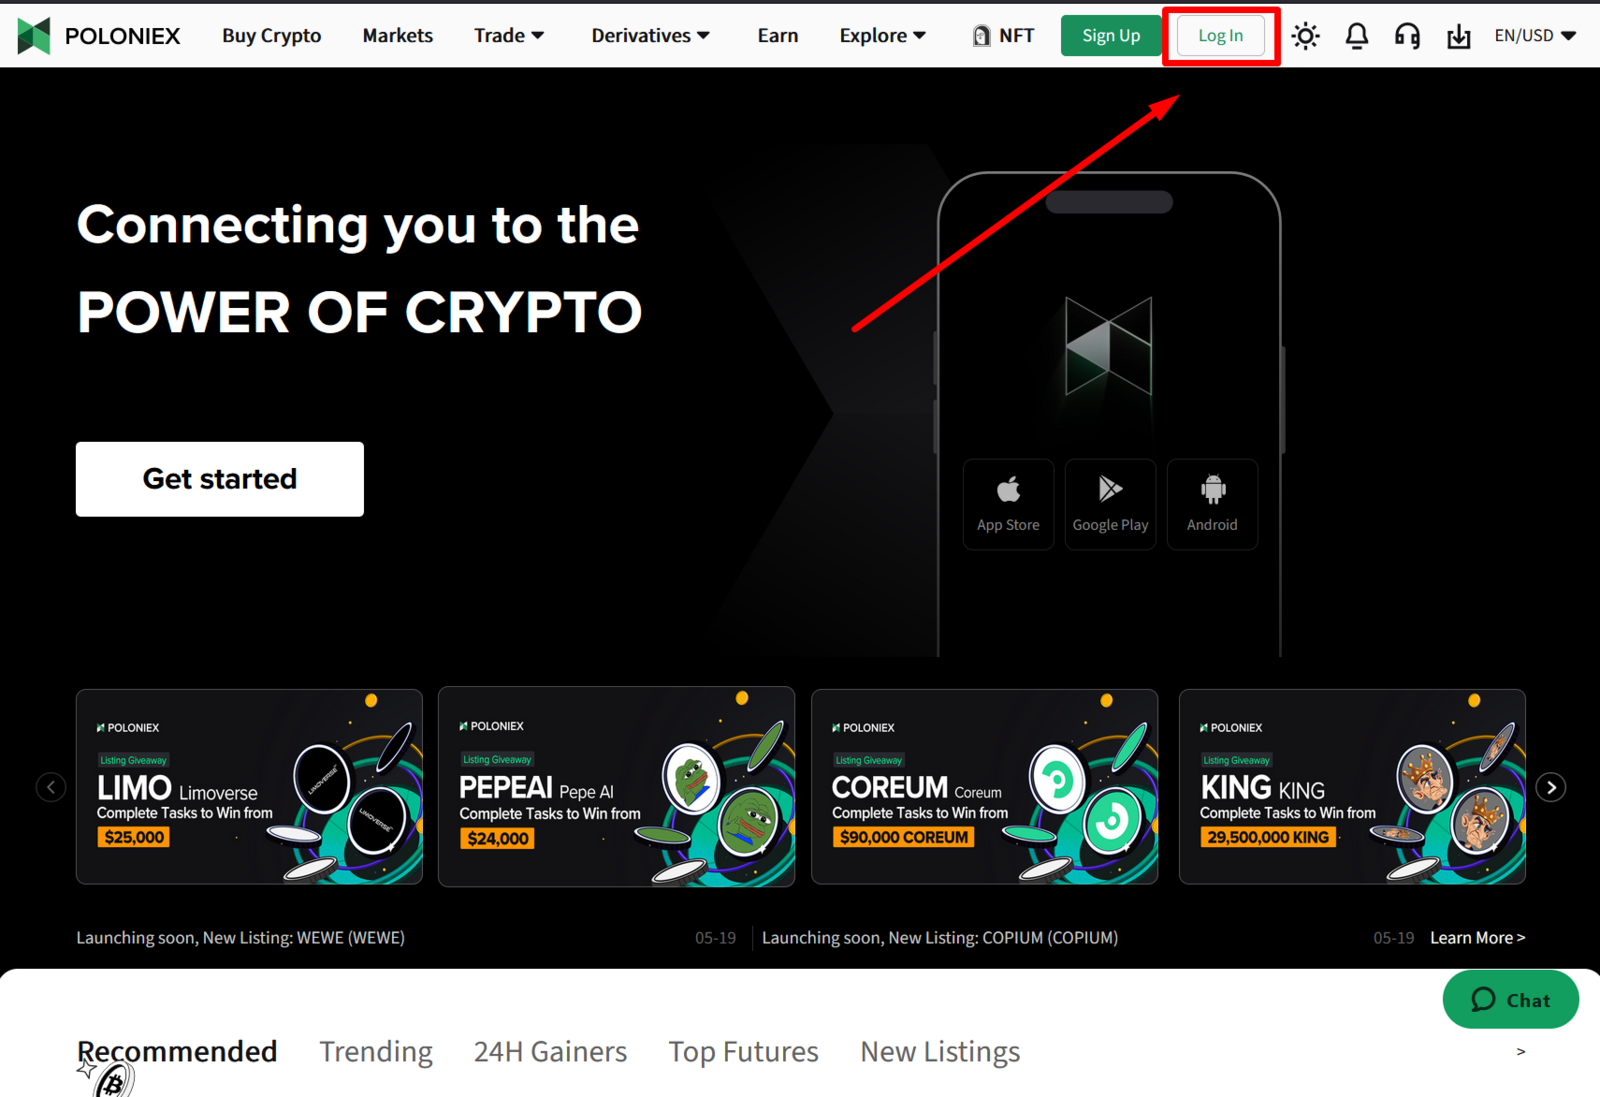
Open Poloniex in your browser and log in to your account.
 🔍 Click the image to see a larger version
Step 2: Open Security settings
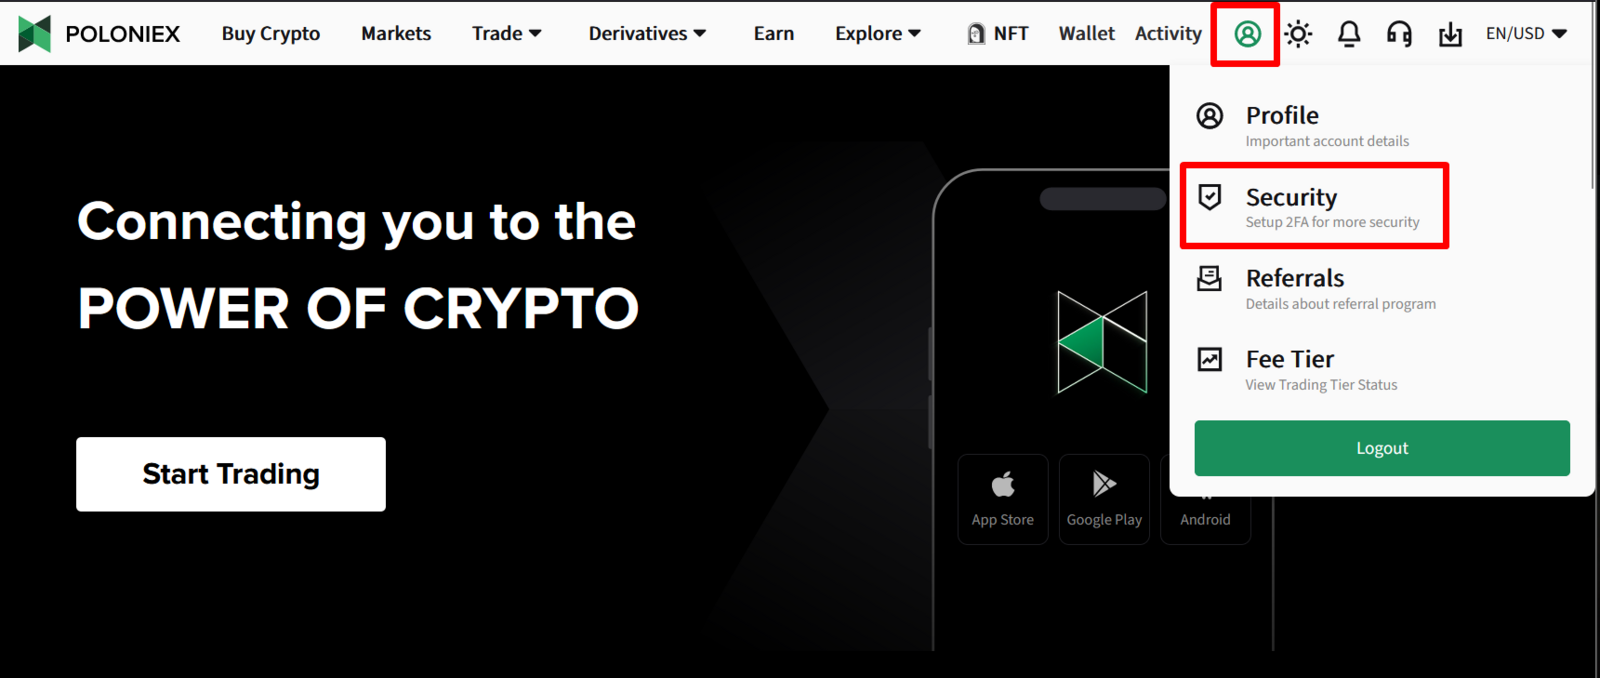
After signing in, click Settings in the navigation bar, then choose Security.
 🔍 Click the image to see a larger version
Step 3: Enable API access
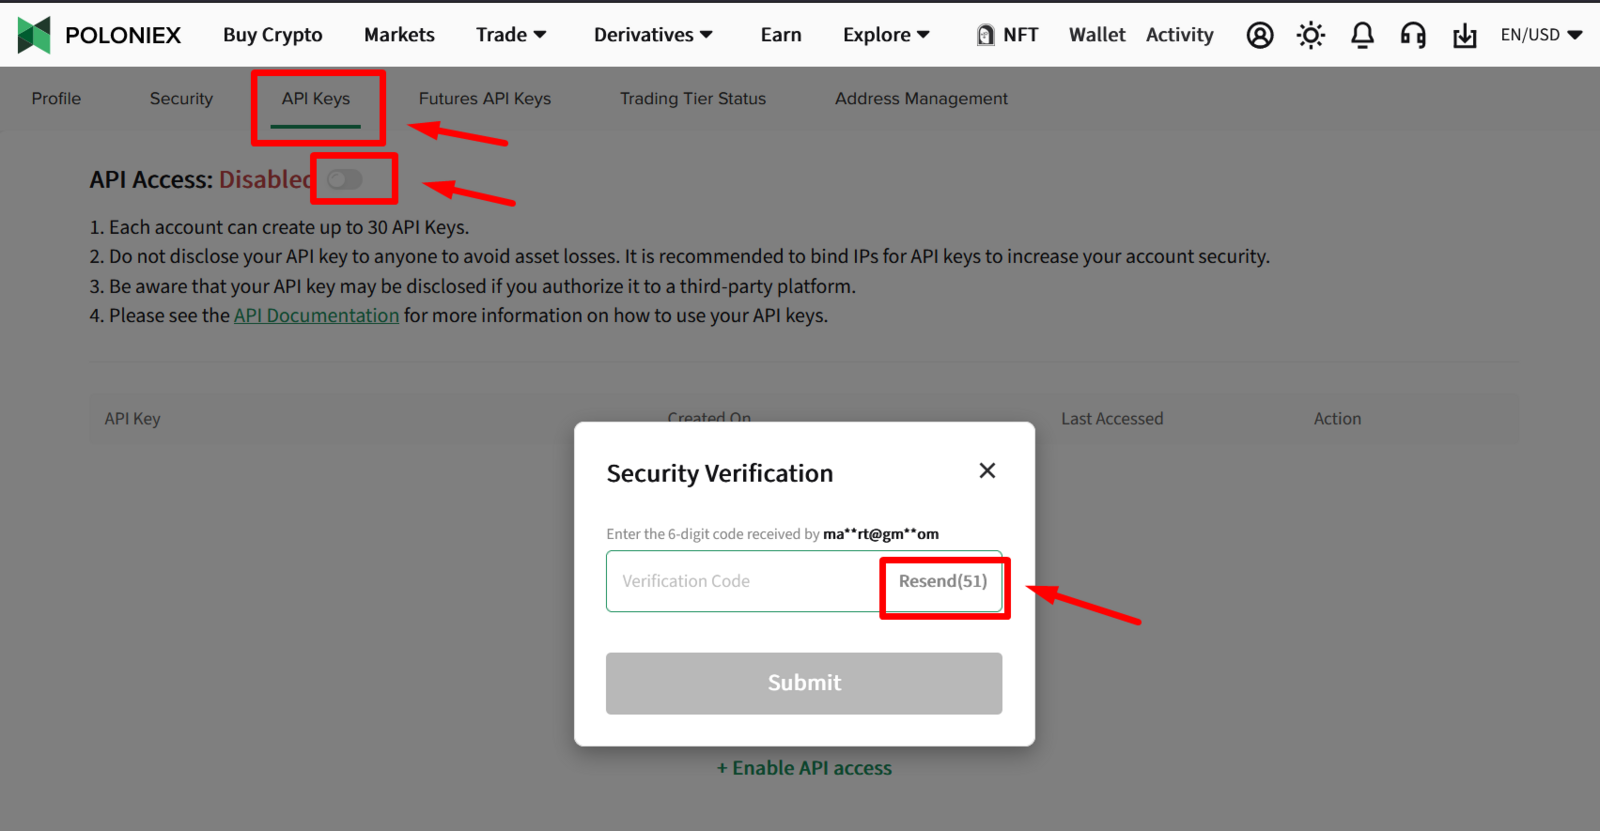
- Open the “API Keys” widget. You’ll see a message saying “API ACCESS IS DISABLED.” Click Enable API to turn it on.
- Click “Send code”. Poloniex will email you a verification code; enter it in the field and press “Submit”.
 🔍 Click the image to see a larger version
Step 4: Create the API key
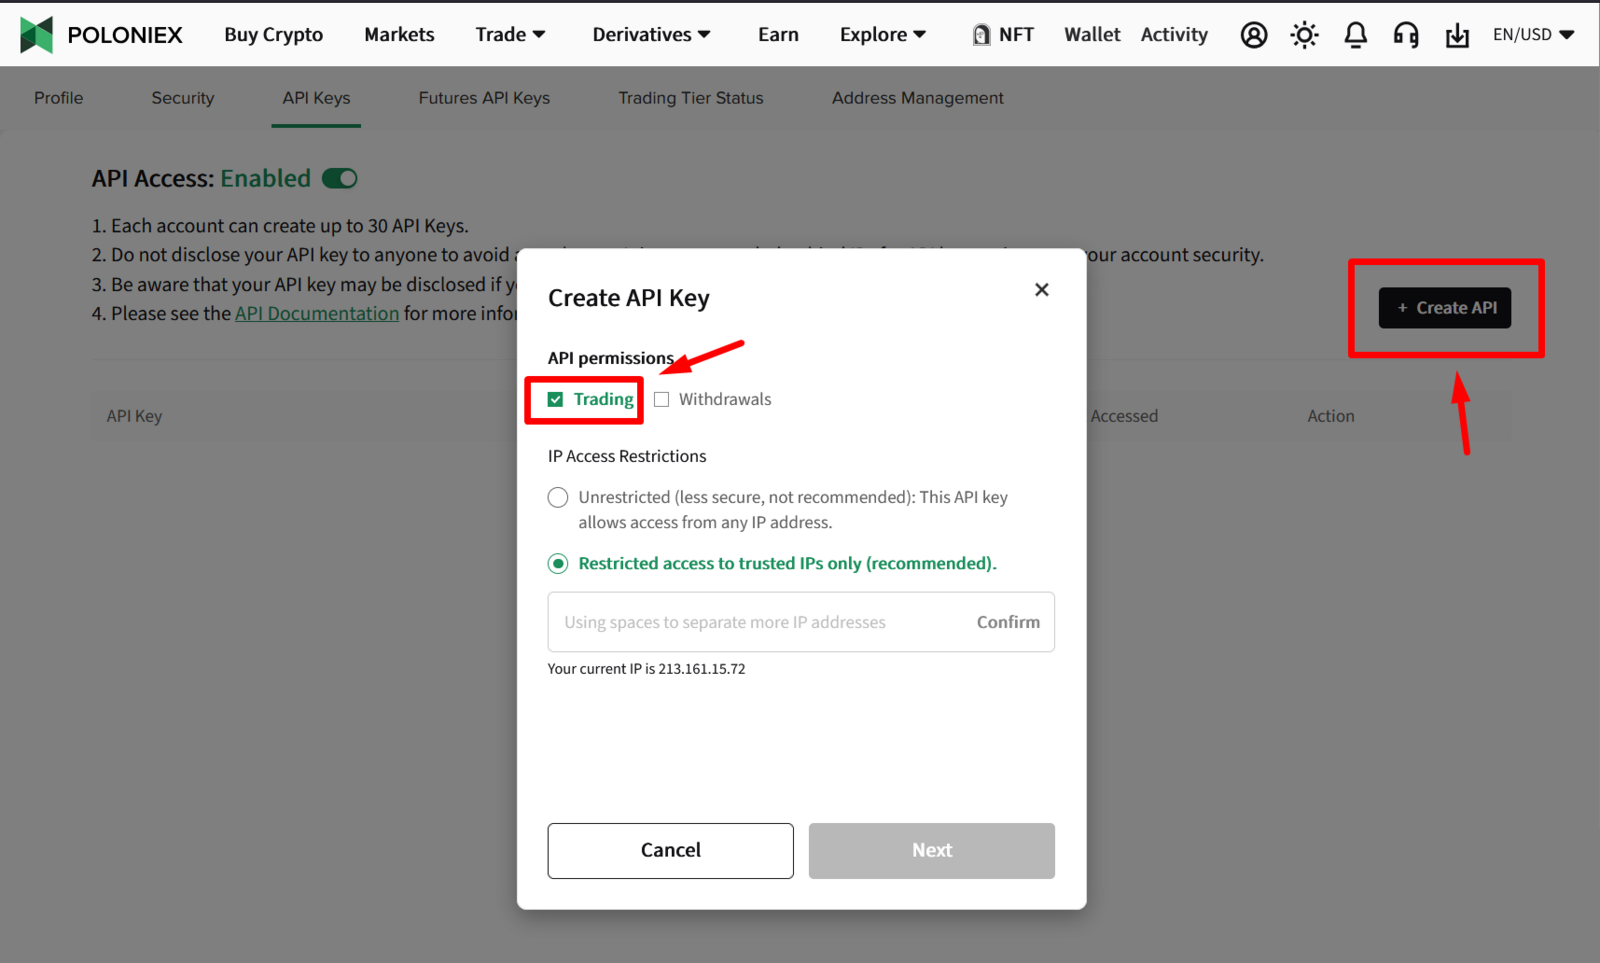
Click “Create API” and enable the “Trading” API permission.
That’s all Altrady needs; do not enable withdrawal permissions. Altrady never asks for the ability to withdraw funds, and you should never grant it to any trading app.
 🔍 Click the image to see a larger version
Step 5: Start the connection in Altrady
- In Altrady, go to “Exchange accounts” and click “Add api key”.
- Select Poloniex from the list of exchanges and give the connection a label so you can recognize it later.
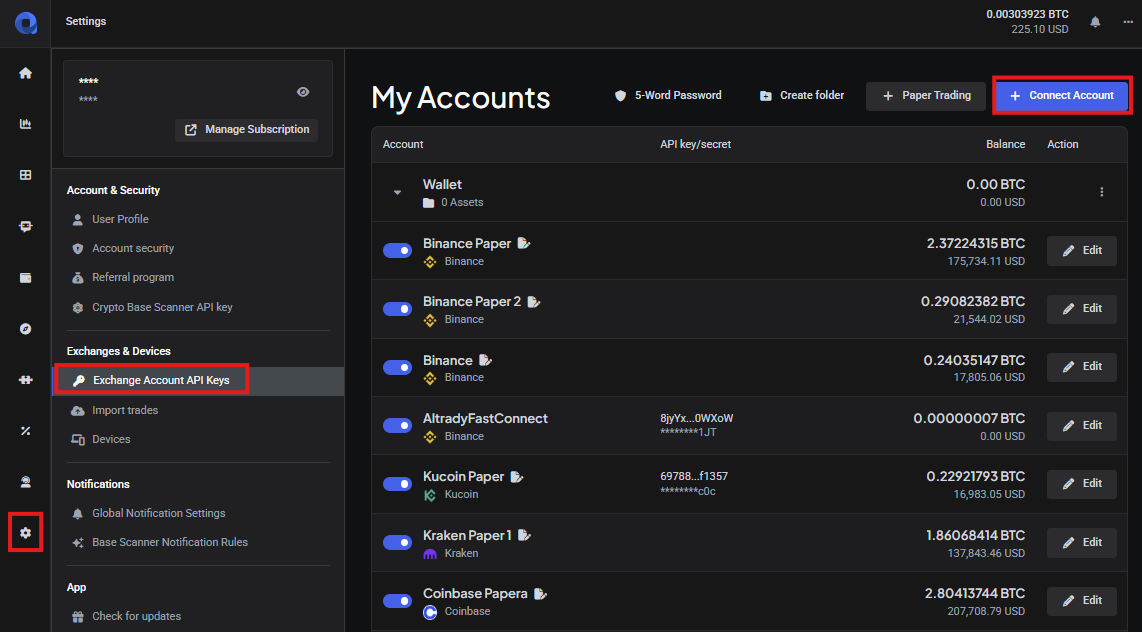 🔍 Click the image to see a larger version
Step 6: Add Altrady’s IP whitelist (optional)
You can restrict your Poloniex API key so it only works from Altrady’s servers. This is optional but adds an extra layer of safety.
- In Altrady, click “Copy” to copy the IP whitelist.
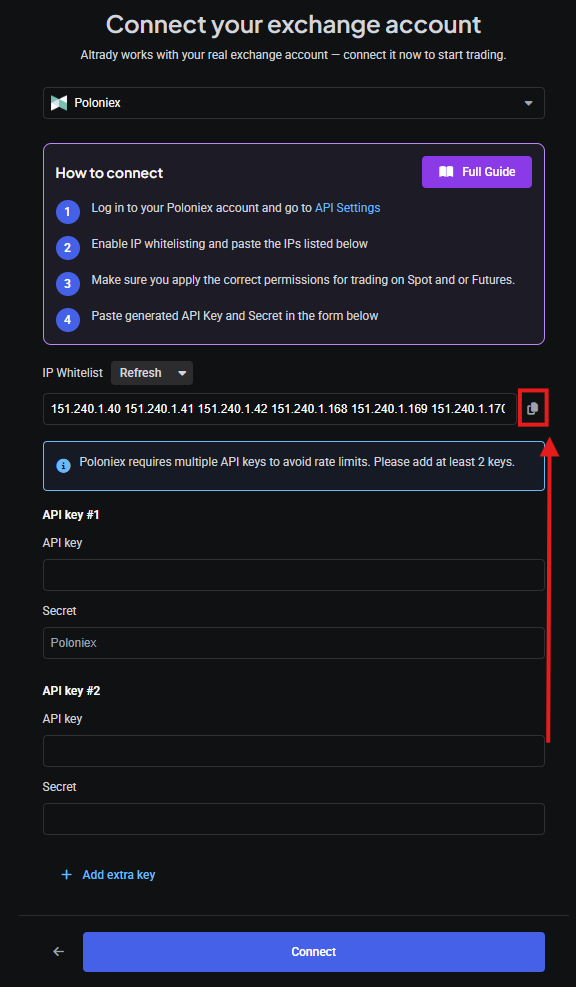 🔍 Click the image to see a larger version
- Go back to Poloniex and paste the list into the IP whitelist field. Press “Confirm”: the list will appear underneath. Then go back to Altrady and press “Next”.
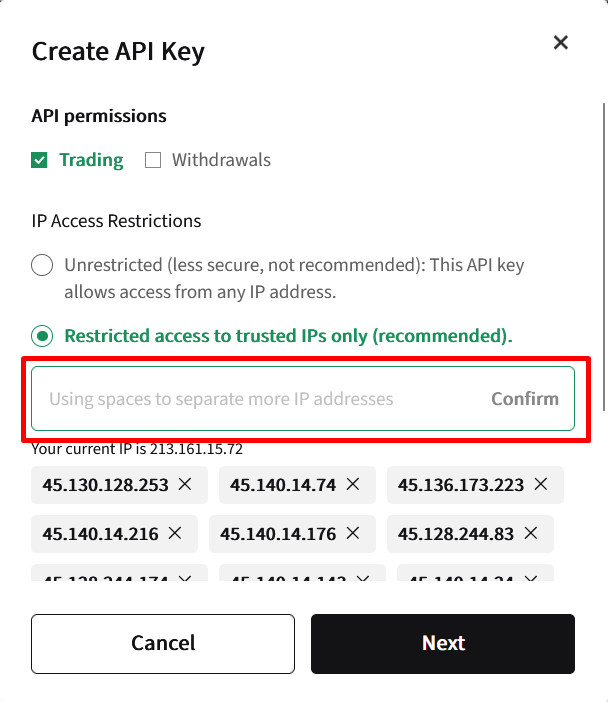 🔍 Click the image to see a larger version
Step 7: Verify by email
A verification window will pop up. Check your email for the code, then copy or type it into the field and click “Continue”.
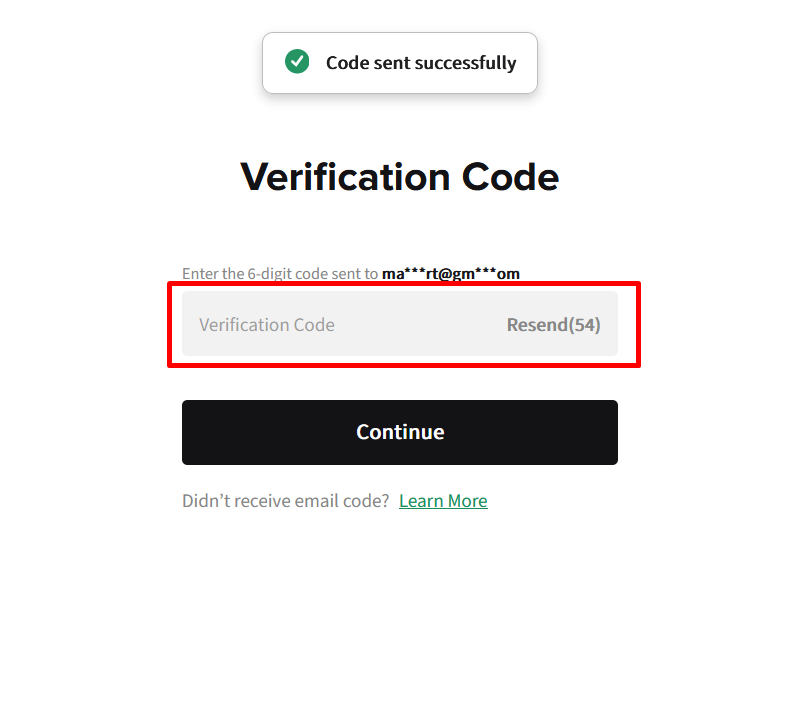 🔍 Click the image to see a larger version
As a security measure, this confirmation link expires in 15 minutes, so don’t leave it sitting in your inbox too long.
Step 8: Copy your keys from Poloniex
You’ll be sent back to Poloniex, where you’ll see “API ACCESS IS ENABLED.” Poloniex will generate an API Key and a Secret Key. Copy both; you’ll need them on the Altrady site in the next step.
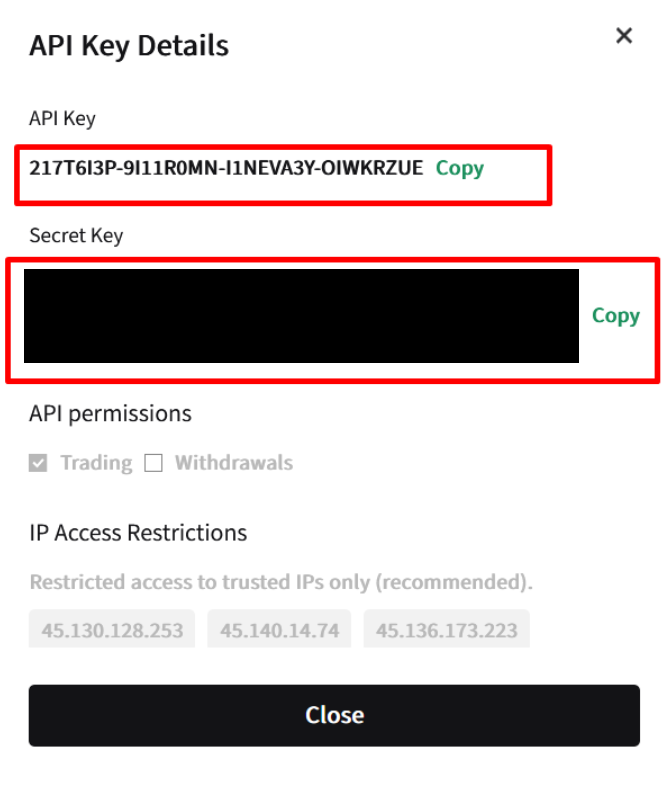 🔍 Click the image to see a larger version
Step 9: Paste your keys into Altrady
Paste the API key and secret key from Poloniex into the matching fields in Altrady, click “Save”, then “Add”.
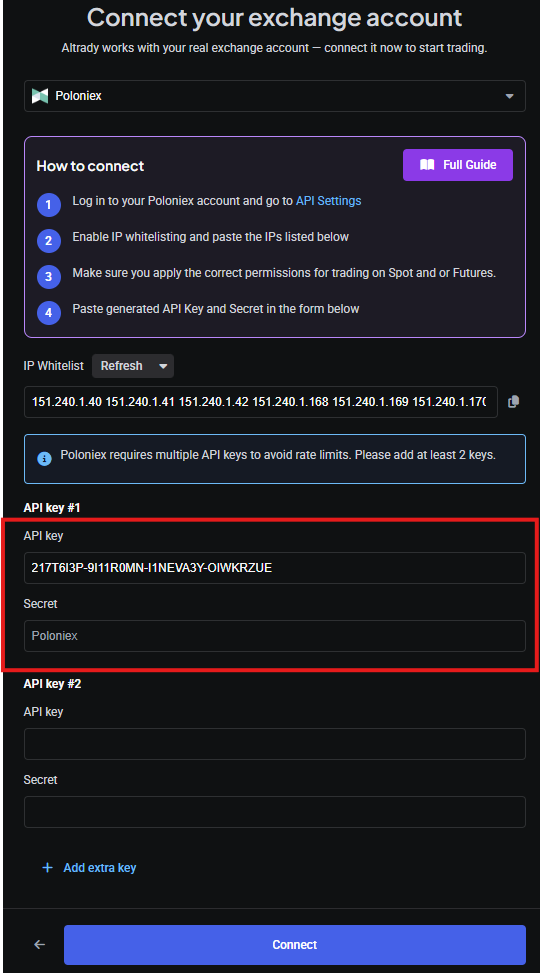 🔍 Click the image to see a larger version
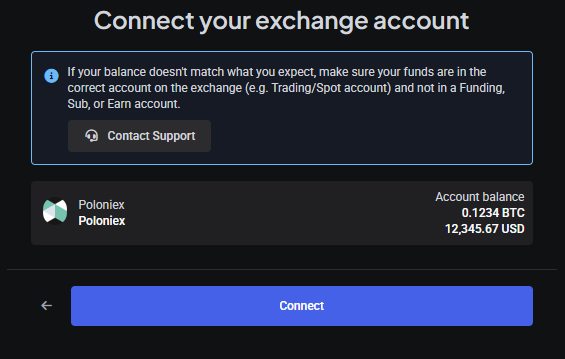 🔍 Click the image to see a larger version
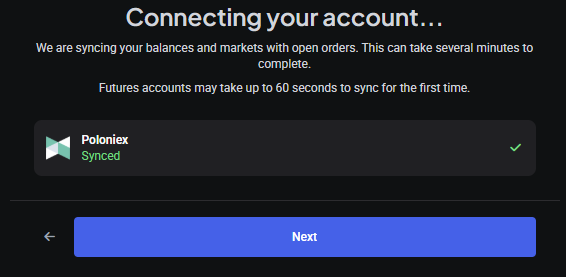 🔍 Click the image to see a larger version
Step 10: You’re connected
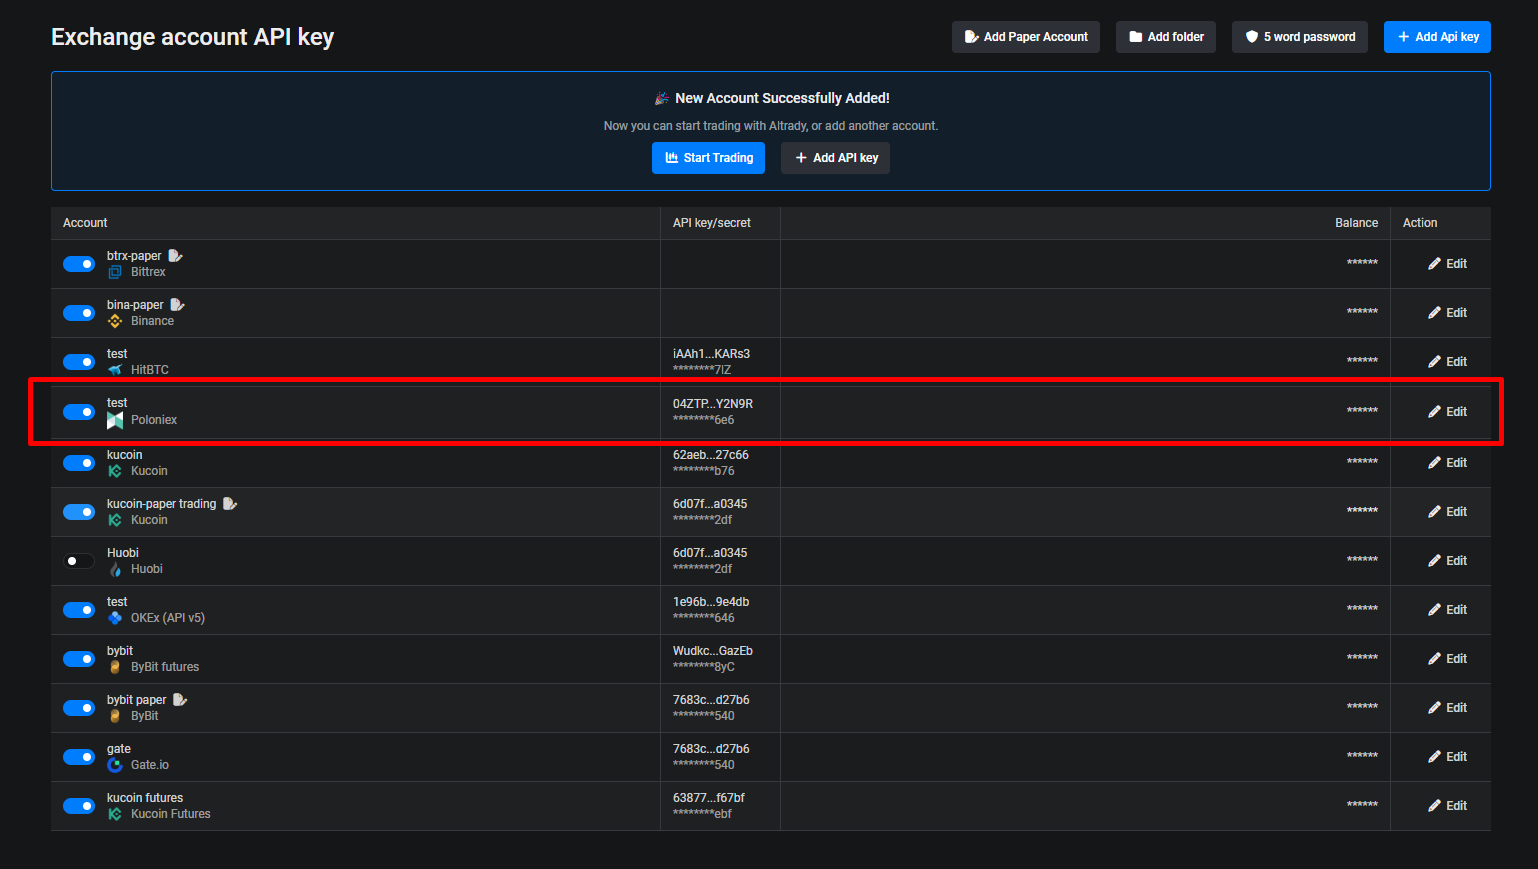
Your Poloniex account is now connected to Altrady. You can edit these details anytime using the edit icon; handy if you need to add extra keys to your existing Poloniex connection.
 🔍 Click the image to see a larger version
Step 11: Add a second API key (optional, recommended)
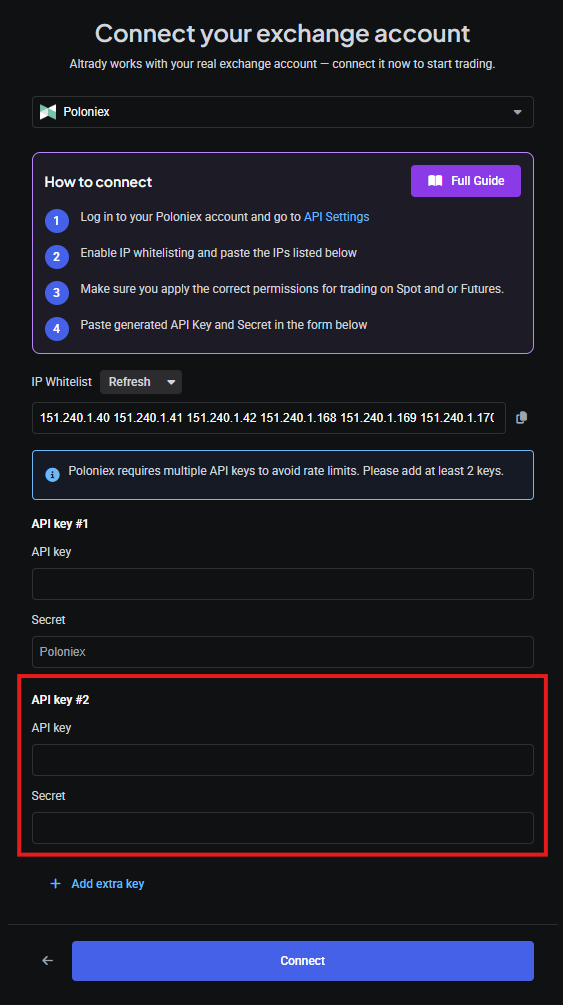
Poloniex limits how many trading requests can be made per second. If you trade actively, adding a second API key to the same Poloniex connection in Altrady doubles your allowance and helps you avoid rate-limit errors.
Create the extra key on Poloniex the same way you created the first one, then add it under API Key #2 (or #3, and so on) in Altrady.
 🔍 Click the image to see a larger version
Having trouble?
If your balances aren’t updating or the connection isn’t working, see Connection Problems.