
Connect HitBTC
Connect HitBTC
Connecting your HitBTC account lets Altrady see your balances and place trades for you. It only takes a few minutes, and Altrady never asks for permission to withdraw your funds.
HitBTC doesn’t currently offer Fast Connect (one-click login), so you’ll connect it the manual way, using an API key. Don’t worry: just follow the steps below in order.
If you get stuck at any point, check API Keys Explained for background on what an API key is and why it’s safe.
Step 1: Log in to HitBTC
Go to the HitBTC website in your browser and log in to your account.
 🔍 Click the image to see a larger version
Step 2: Open the API keys page
Click the Settings icon in the top-right corner of the navigation bar, then switch to the API keys tab.
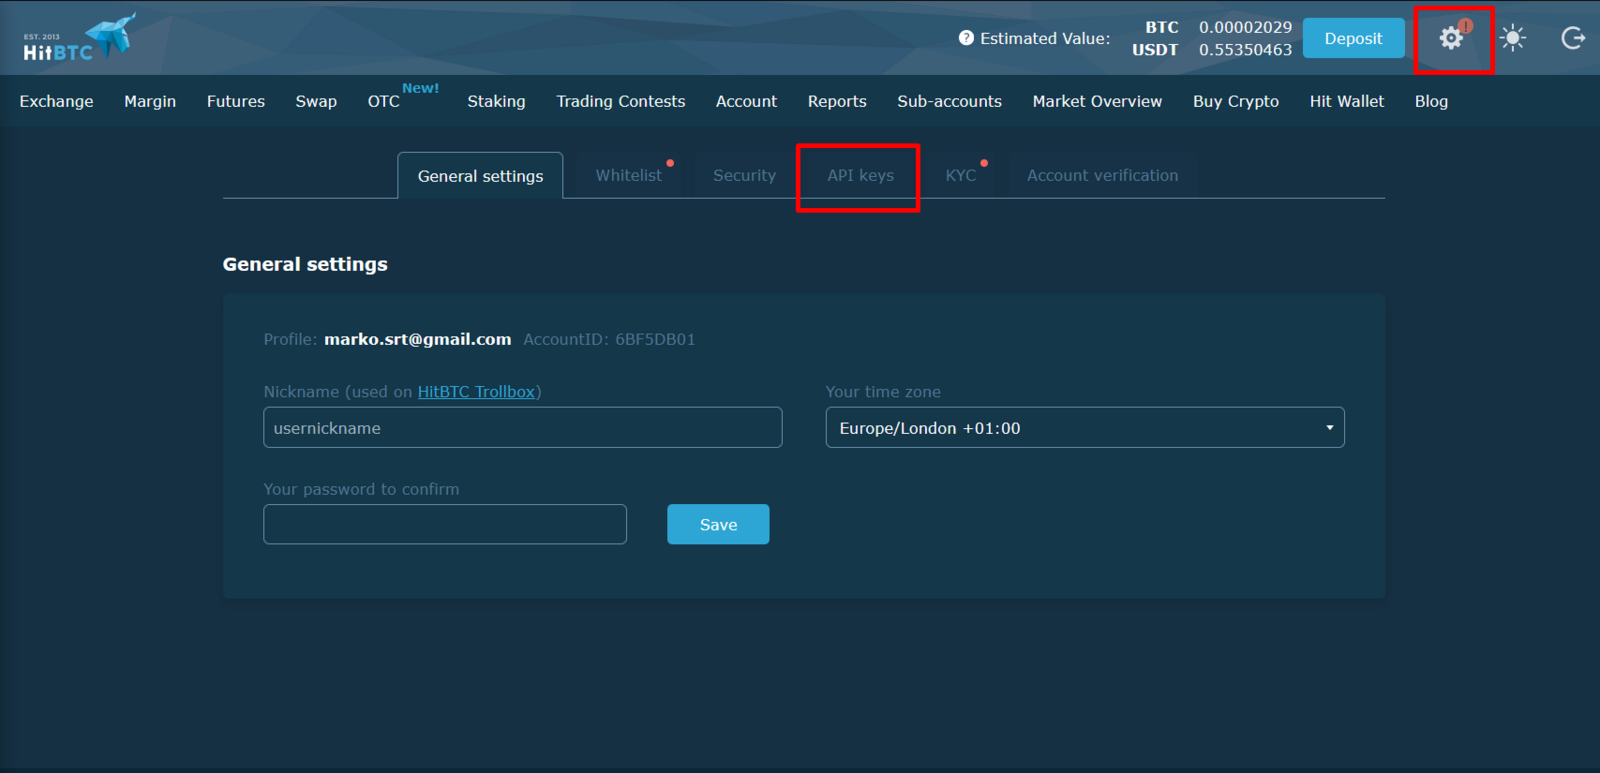 🔍 Click the image to see a larger version
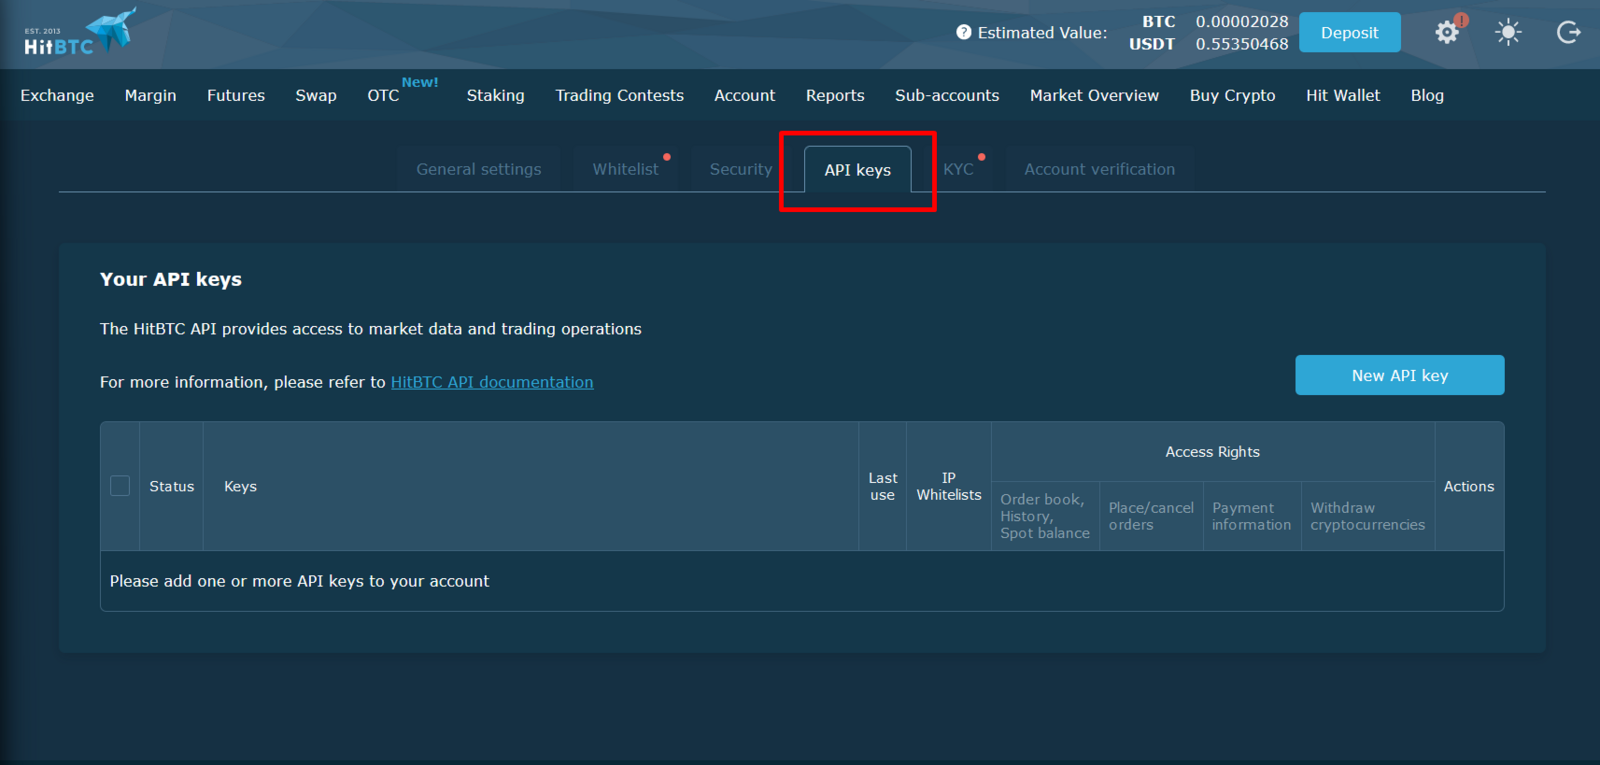 🔍 Click the image to see a larger version
Step 3: Create a new key
Click New API Key to start creating your key.
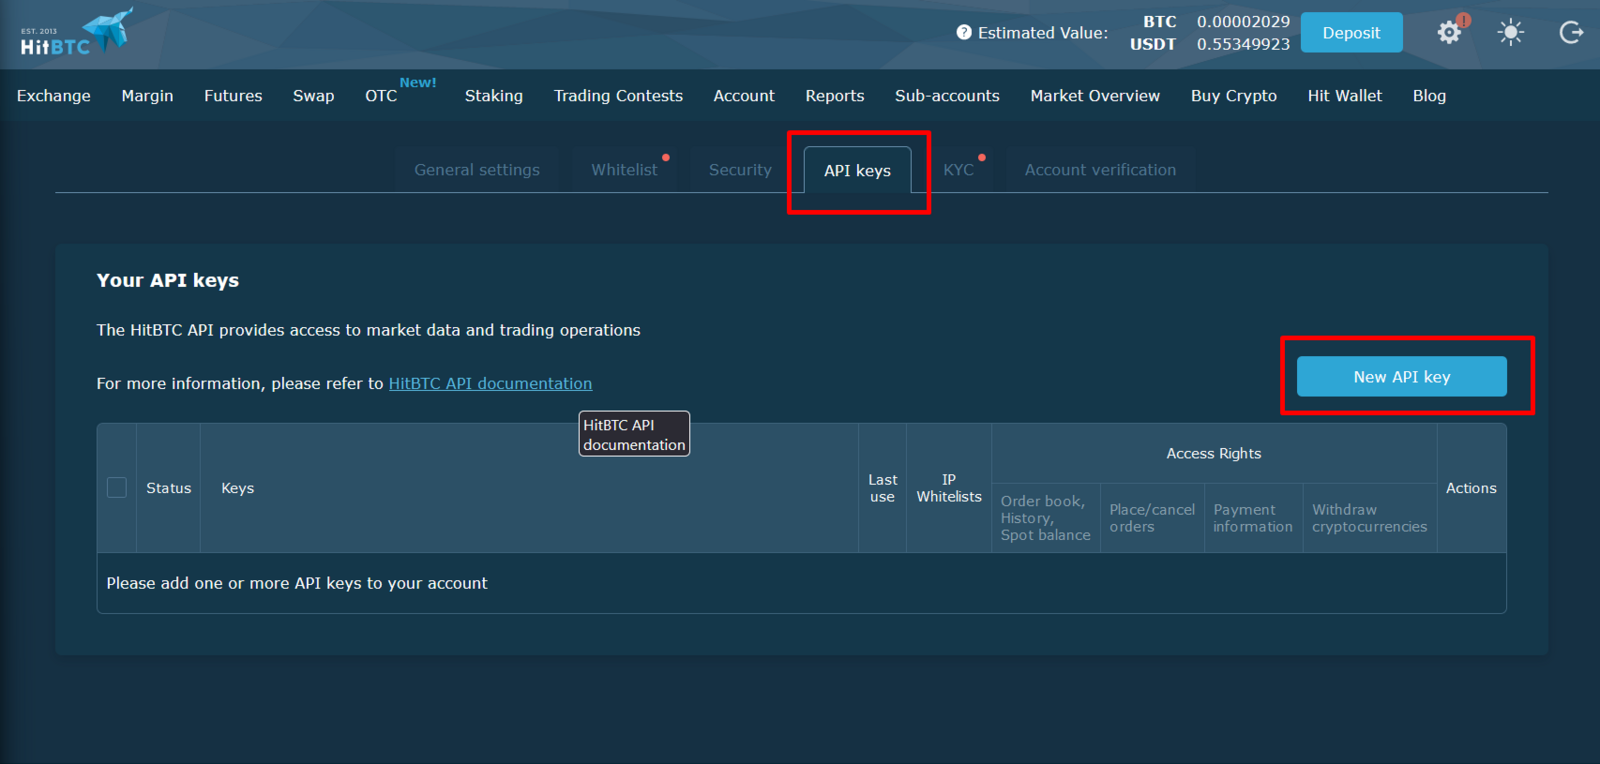 🔍 Click the image to see a larger version
Step 4: Set up 2FA if you haven’t already
If you skipped two-factor authentication (2FA) when you signed up, HitBTC will show a pop-up asking you to enable it before you can create an API key. Click Secure your account, set up your 2FA, then repeat Steps 2 and 3.
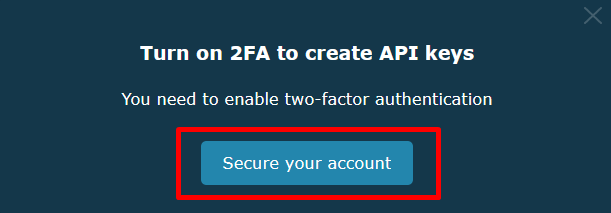 🔍 Click the image to see a larger version
Step 5: Copy your API key and secret key
If 2FA is already set up, a window will appear showing your API key and Secret key.
- Copy both codes somewhere safe; you’ll need them in a moment.
- Click I Understand.
- Then head over to the Altrady website.
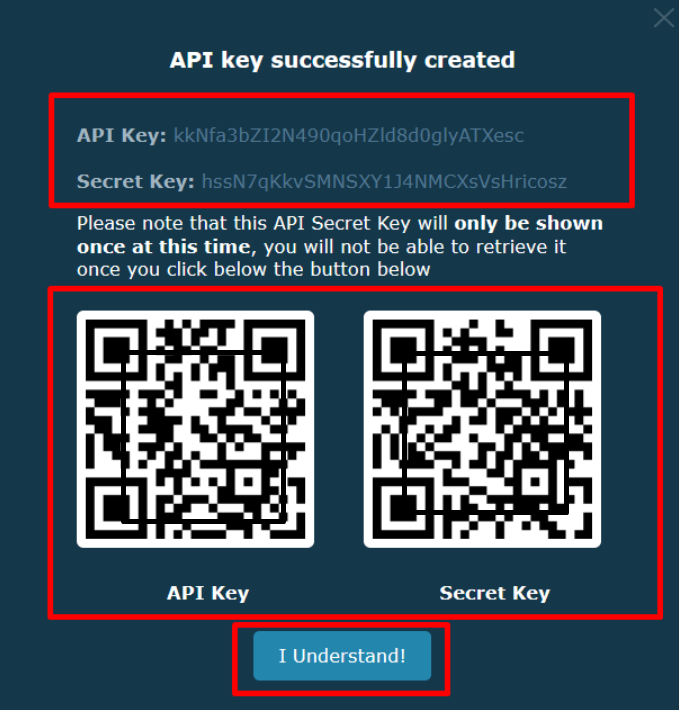 🔍 Click the image to see a larger version
Step 6: Add the key in Altrady
In Altrady:
- Open the Exchange account API keys page.
- Click Add Api Key.
- Select Hitbtc from the exchange drop-down menu.
- Paste in the API key and secret key you copied from HitBTC.
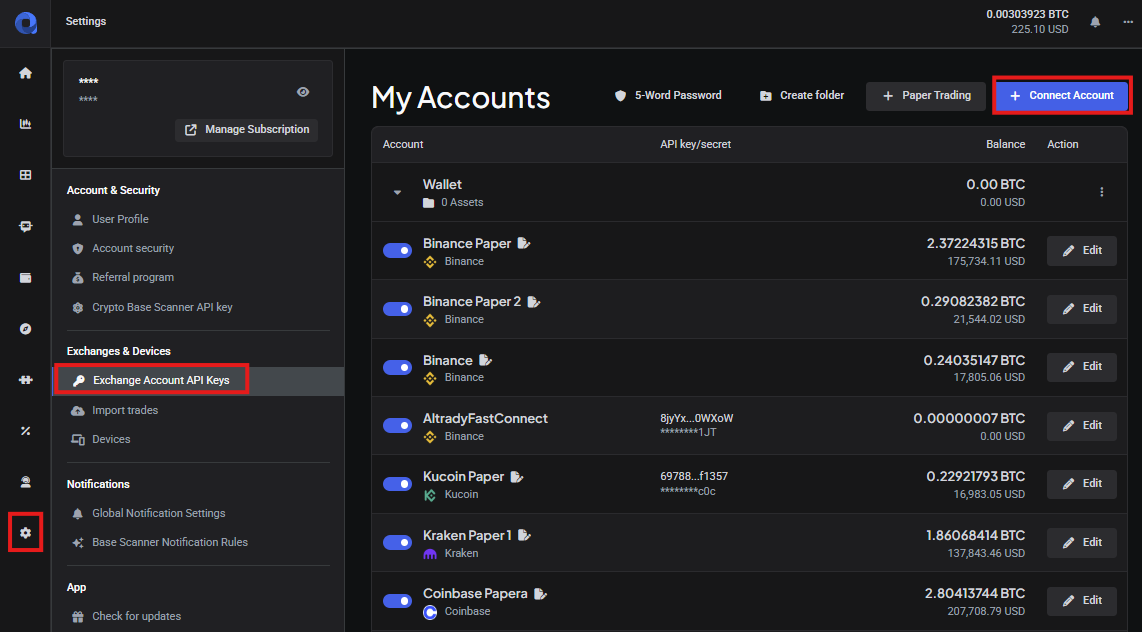 🔍 Click the image to see a larger version
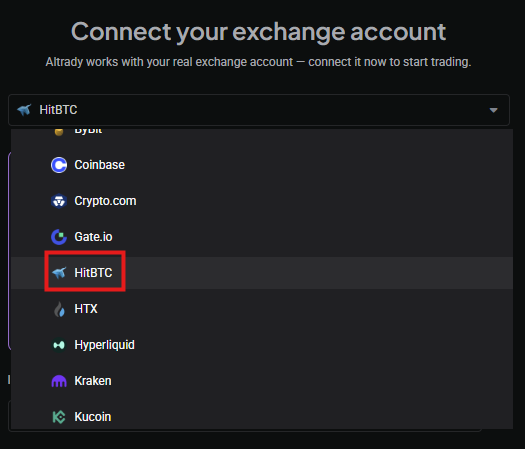 🔍 Click the image to see a larger version
Step 7: Set the permissions on HitBTC
Back on HitBTC, you’ll need to edit the permissions on your API key so Altrady is allowed to trade on your account.
You can also add the IP whitelist here now if you’d like, by clicking Edit next to IP whitelist, but in this guide we’ll add it afterward, in Step 10.
When you’re ready, click Save.
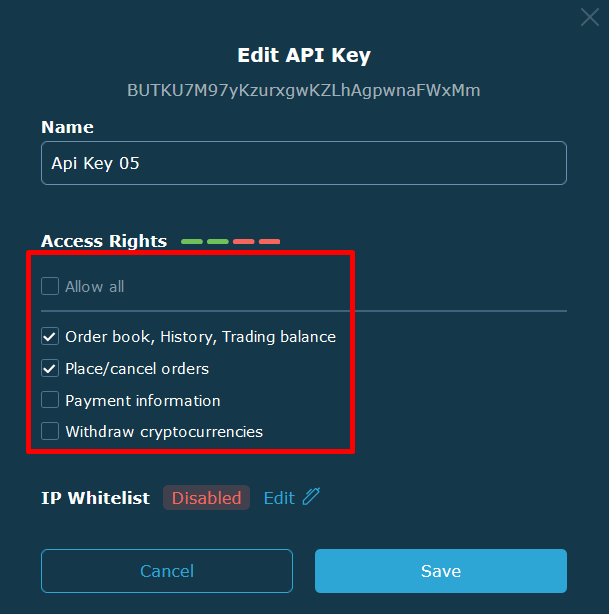 🔍 Click the image to see a larger version
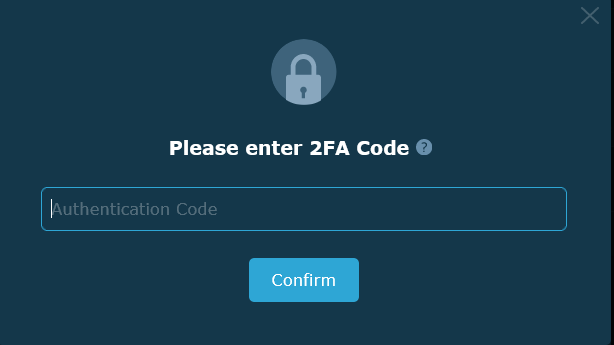
Step 8: Confirm with 2FA
HitBTC will ask you to authenticate. Enter your 2FA code and click Confirm.
 🔍 Click the image to see a larger version
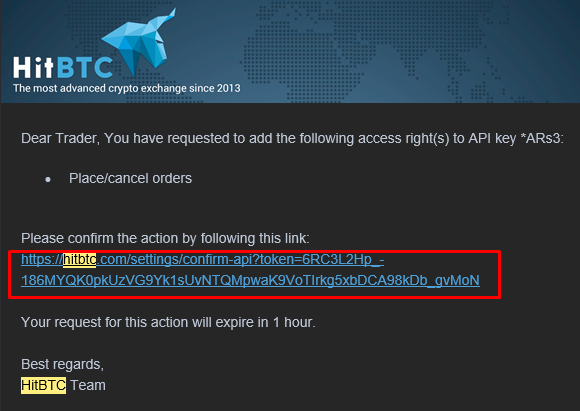
Step 9: Your key is created
Your API key is now created. You may need to confirm some permissions from an email HitBTC sends you.
 🔍 Click the image to see a larger version
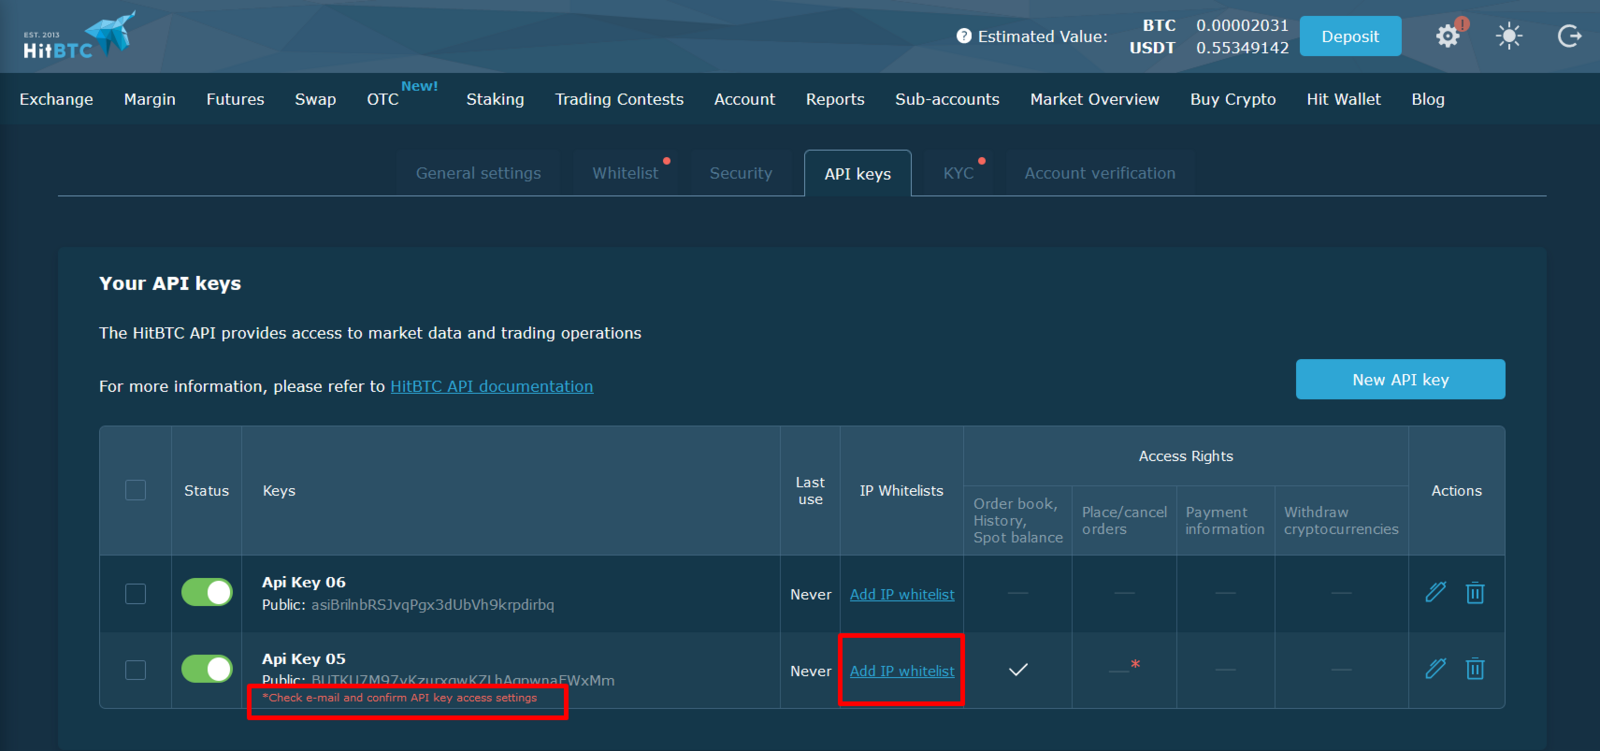
Step 10 (optional but recommended): Add Altrady’s IP whitelist
For extra security, we recommend adding Altrady’s IP whitelist to your API key.
 🔍 Click the image to see a larger version
- Click Add IP whitelist on HitBTC (shown in the image above).
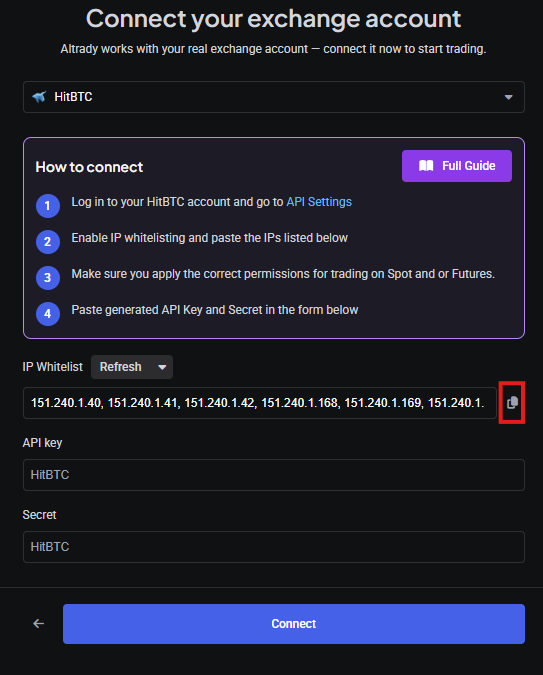
- Go back to Altrady and click the copy icon to copy Altrady’s IP whitelist to your clipboard.
 🔍 Click the image to see a larger version
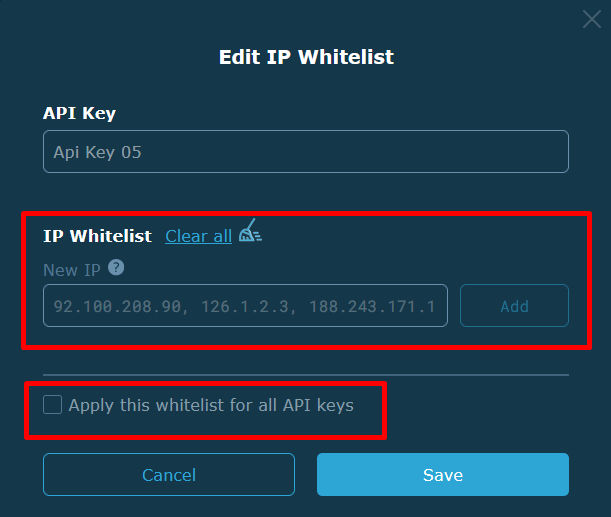
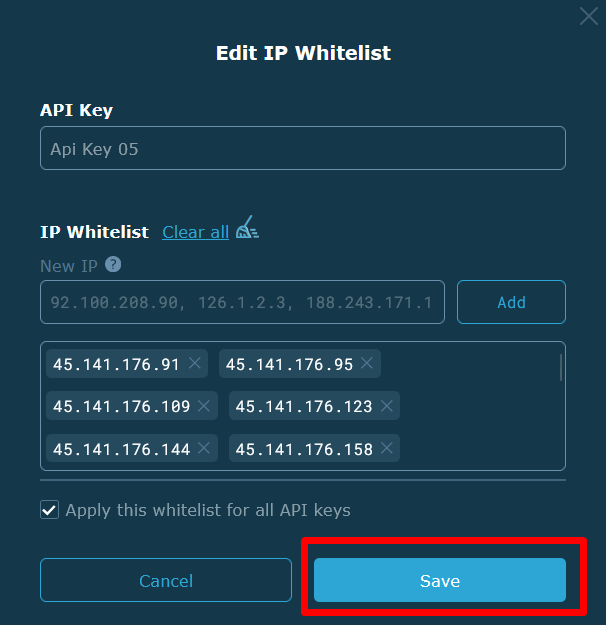
- Go back to HitBTC, paste the whitelist into the IP whitelist field, and click Add.
 🔍 Click the image to see a larger version
 🔍 Click the image to see a larger version
- Click Save.
Step 11: Connect
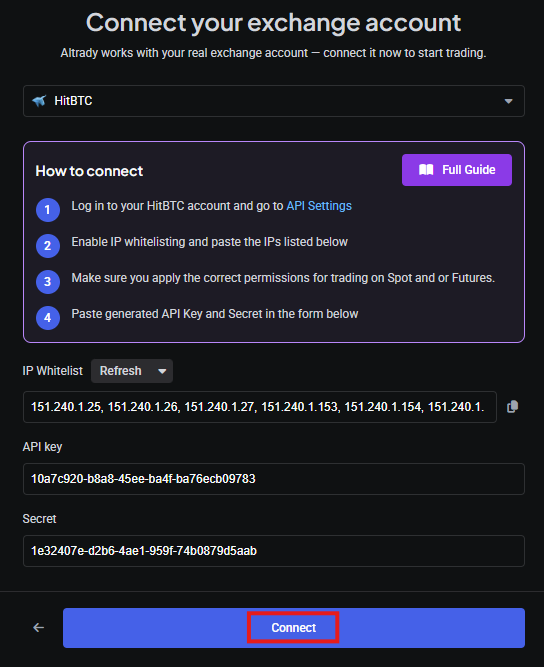
Go back to Altrady and click Connect.
 🔍 Click the image to see a larger version
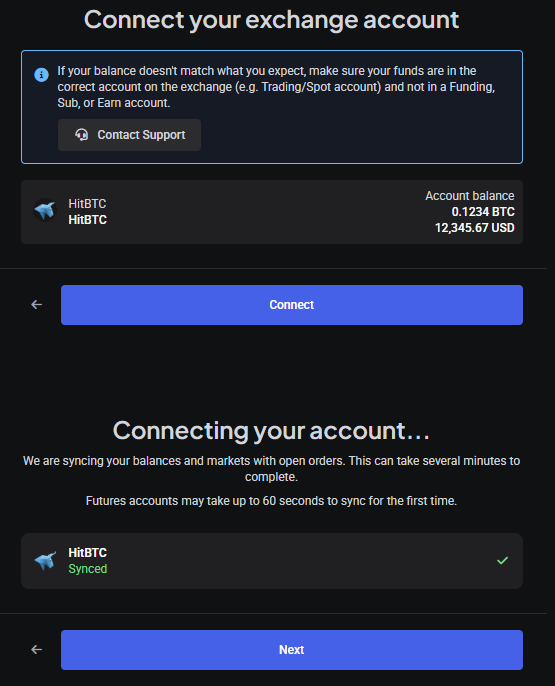
Click Connect again, and then click Next.
 🔍 Click the image to see a larger version
You’re connected
That’s it: your HitBTC account is now connected to Altrady.
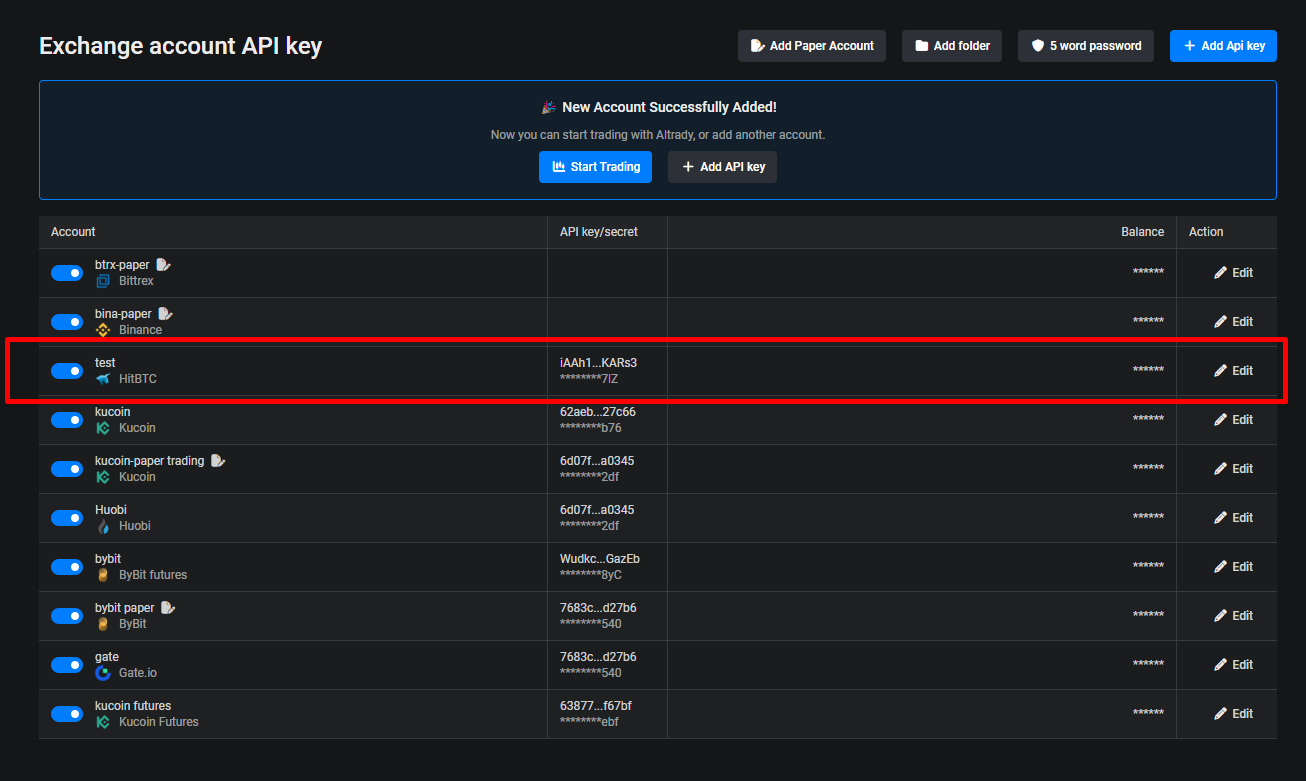 🔍 Click the image to see a larger version
If your balances haven’t updated yet, they usually sync within a few minutes. If you still don’t see your HitBTC balance, double-check that your funds are sitting in your Trading Account on HitBTC; Altrady can’t see balances held in any other HitBTC account (like a savings or margin wallet).
Having trouble?
If something isn’t working as expected, take a look at Connection Problems for common fixes.